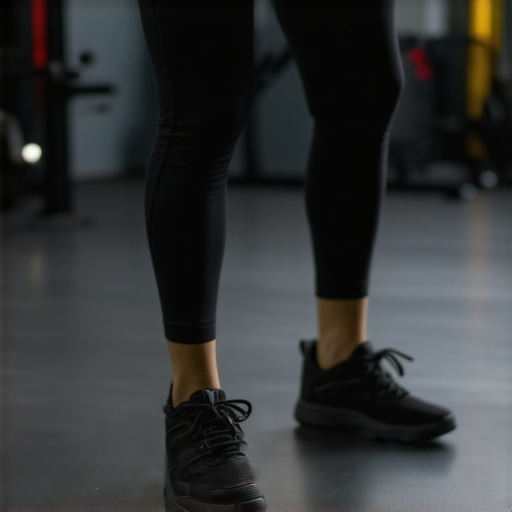
The 2-Minute Ankle Drill That Fixes Your Squat Depth
One morning, I was trying to squat down to pick up my toddler, and suddenly, a sharp twinge shot through my lower back. I froze, heart racing. Frustration bubbled up. No matter how many stretches or foam rolling sessions I tried, that stubborn pain refused to budge. It was a lightbulb moment—realizing that my mobility issues weren’t just about my back but stemmed from my ankles. If you’ve ever struggled with squat depth or experienced persistent back discomfort, you’re not alone. Many of us neglect a tiny, often overlooked link in our mobility chain: the ankle. Improving ankle mobility can unlock your squat, prevent injury, and even ease back pain. Today, I want to share an incredibly effective, quick exercise that changed my approach—The 2-Minute Ankle Drill.
Why Your Ankles Might Be Sabotaging Your Squat and Back Health
Is the Buzz About Ankle Mobility Overhyped?
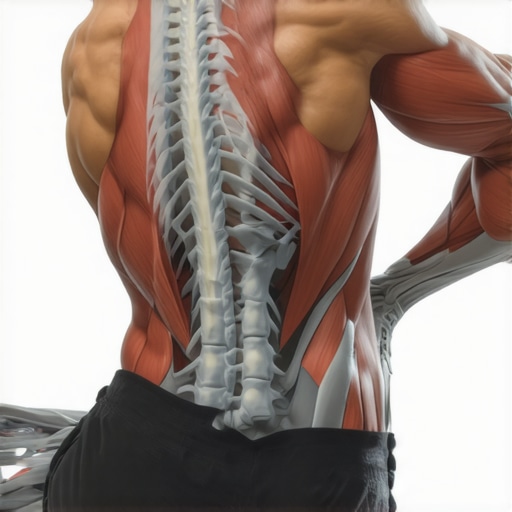
Early in my journey, I made a classic mistake—focusing only on my back and hips without addressing my ankles. I thought flexibility exercises targeted at the hips would solve everything. Then I stumbled upon a study revealing that limited ankle dorsiflexion is a common culprit behind poor squat depth and lower back strain (source). It turns out that when your ankles can’t move freely, your body compensates by overusing other regions, especially the lumbar spine, leading to chronic pain and compromised performance.
What many don’t realize is that early on, I was doing something critical wrong—ignoring the importance of holistic mobility. I focused solely on strengthening my core or stretching my back but failed to see how my ankles were limiting my movement. This oversight prolonged my discomfort and hindered progress. Once I started incorporating targeted ankle mobility drills, everything shifted. The benefits weren’t just in my squat depth but also in how my back felt after workouts. Better ankle mobility meant my pelvis and lumbar spine could stay in proper alignment, reducing strain.
If you’ve faced similar struggles—poor squat depth, back pain during or after exercise, or just can’t seem to get comfortable in your position—there’s a good chance your ankles might be the hidden issue. The good news? It’s a fix that takes less than two minutes a day and can be done anywhere. Stay tuned—next, I’ll walk you through the simple, proven drill that transformed my mobility and eased my pain. And don’t worry—this isn’t just fluff. I’ll share insights from top experts that underscore how small, consistent changes can result in big improvements—a concept supported by existing research on mobility and injury prevention.
Start with a Dynamic Warm-Up
Before diving into the ankle drill, spend 1 minute doing light jogging in place or swinging your legs forward and backward. This prepares your joints and muscles, making the subsequent exercise more effective. I remember during my first attempt, neglecting this step left me feeling stiff and limited in movement, but after warming up, I noticed a significant increase in mobility.
Identify Your Tight Spots
Stand facing a wall, place your toes about 2 inches away, and try to bend your knee forward without lifting your heel. If your knee doesn’t touch the wall, note which side is more limited. This self-assessment helps you tailor the exercise to your needs. When I lacked awareness, I would push through pain, which was counterproductive. Recognizing my limitations prevented injury and guided my focus.
Perform the 2-Minute Ankle Drill
Get into a deep kneeling position with your toes tucked under and your hands on your thighs for support. Slowly shift your weight forward, applying gentle pressure into your toes to stretch the ankle joint. Hold each stretch for 15 seconds, then relax. Repeat for about 2 minutes, aiming for controlled, smooth movements. During my first try, I panicked at the discomfort, but focusing on controlled breathing made the stretch more manageable.
Use a Resistance Band for Joint Mobilization
Wrap a resistance band around the top of your foot, anchoring it to a stable surface. Gently pull the band to dorsiflex your ankle, then move your ankle side to side to mobilize the joint. This technique helps break up adhesions and increases range of motion. I added this step after a week of basic drills, noticing my ankle could now bend more comfortably, translating into deeper squats.
Incorporate Strengthening Moves
To support increased mobility, perform calf raises, standing on one leg and slowly raising your heels, then lowering them. Strengthening the muscles around your ankle stabilizes the joint, reducing injury risk. I found that adding three sets of 10 reps after mobility drills made a noticeable difference in my balance and squat depth.
Maintain Consistency for Lasting Results
Set aside 2 minutes daily to perform this routine. Consistent practice over weeks is crucial; I committed to this every morning. The initial days felt awkward, and progress was slow, but steadily, my ankle flexibility improved, and my back pain decreased. Think of it like planting a seed—small daily efforts yield long-term growth.
Optimize Your Environment
Choose a quiet, comfortable space with a soft surface like a yoga mat. This minimizes discomfort during stretches and encourages regular practice. Once, I tried doing the drills on a hard tile, which made the experience unpleasant, leading me to skip days. Creating a dedicated space helped me stay committed.
Address Compensations and Posture
During the drill, ensure your knees track over your toes and avoid letting your heels lift. Proper alignment ensures targeted stretching and prevents compensatory patterns that could lead to other issues. I caught myself leaning forward initially, which diminished the stretch. Watching tutorials and filming myself helped correct my form.
Support with Chiropractic Care
If persistent pain or stiffness remains despite consistent exercise, consider consulting a chiropractor. They can assess for underlying issues and provide adjustments that facilitate mobility. I experienced noticeable improvements after a professional session, reinforcing the value of combining self-care with expert guidance. For more insights, explore these professional methods.
Many people believe that neck pain is solely due to poor posture or recent injury, but the reality is far more nuanced. A common misconception is that traditional stretching or heat packs alone can solve chronic neck discomfort. In truth, the root of persistent neck pain often lies in deeper spinal issues or mobility restrictions that most overlook.
Why Do So Many Misunderstand Neck Pain Relapse?
It’s tempting to rely on quick fixes like medications or superficial exercises, but studies show that addressing only surface-level symptoms neglects the underlying spinal health. For example, poor mobility in thoracic or cervical regions can perpetuate pain even after symptomatic relief. Experts emphasize that real progress requires comprehensive assessments and targeted chiropractic adjustments, which can restore full movement and long-term relief (learn more about effective methods here). A pitfall many encounter is assuming that each episode of pain is isolated; however, without correcting mobility restrictions, episodes tend to recur—sometimes with increasing severity. Consequently, deepening your understanding of spinal biomechanics is crucial for meaningful recovery. Another trap is ignoring the connection between neck pain and overall spinal health. For instance, limited mobility in the upper back can strain the neck muscles, leading to tension headaches and stiffness. Recognizing this interconnectedness leads to more effective solutions. Have you ever fallen into this trap? Let me know in the comments. Addressing these nuances requires attention to detail that most overlook. Not all chiropractic adjustments are created equal—many clinics focus only on the local area, missing the global mobility picture. Advanced practitioners assess and treat the entire spine to restore harmony, which significantly reduces recurrence risk. Moreover, a common myth is that resting more will heal neck injuries; in reality, controlled mobilization under expert guidance often accelerates recovery. By integrating these advanced insights, you can avoid common pitfalls and achieve lasting relief. So, next time you experience neck pain, consider whether superficial remedies are enough or if a comprehensive spinal health approach is needed. Remember, the key lies in addressing the full mobility chain—your neck’s health depends on it.Maintaining long-term neck and back health demands more than just routines; it requires the right equipment and strategies to support your mobility journey. One of my top choices is the **Foam Roller**, specifically the **TheraBand Sectional Foam Roll**. Its dense yet forgiving surface allows for targeted myofascial release, helping alleviate muscle tightness that can contribute to chronic pain, especially around the upper back and neck. I personally swear by using it post-workout or during my rest days to prevent knots from forming and to promote circulation.
Another essential tool is the **Treat Your Body Mobility Bands**. These durable resistance bands are ideal for joint mobilization exercises, especially for improving ankle dorsiflexion—an area I emphasize for anyone dealing with squat or back issues. I incorporate variations of ankle dorsiflexion with these bands during my daily mobility drills, which has noticeably increased my Range of Motion (ROM).
For digital support, I rely on **MobilityWOD’s App**, which offers structured mobility routines and progress tracking. I find that having a tailored plan helps me stay consistent and focused. Plus, its instructional videos ensure proper form, reducing injury risk.
Looking ahead, the trend in mobility tools seems to lean toward **smart devices** that can give real-time feedback. Imagine sensors embedded in bands or mats that analyze your technique and suggest improvements instantly. This integration of tech will likely make personalized mobility programs more accessible and effective in the future.
How do I keep my mobility routines sustainable over time? The key is integrating these tools into daily habits and adjusting exercises as I progress. I recommend starting with simple tools like resistance bands and foam rollers, then gradually adding tech-supported solutions as you gain confidence.
One advanced tip I urge you to try is the **dynamic ankle dorsiflexion with resistance bands**. It’s a game-changer for unlocking squat depth and reducing back tension. Practice this for just 2-3 minutes daily, and you’ll likely feel a difference in your mobility within weeks. Remember, consistency beats intensity for long-lasting results. For more detailed insights and expert-approved strategies, explore these chiropractic techniques that complement your tool-based routines. Keep experimenting, and make your tools work hard so your body doesn’t have to.
Throughout my experience with persistent neck pain and back discomfort, I learned that the most profound breakthroughs often come from overlooked details and patience. One crucial insight was realizing that improving ankle mobility was pivotal for restoring proper movement and alleviating pain. This taught me that the smallest links in our mobility chain can have the most significant impact when addressed correctly.
What I Wish I Knew About Hidden Mobility Traps
- Chronic pain isn’t always about the site of discomfort. Sometimes, the root cause lies elsewhere, like stiff ankles affecting the entire movement chain. Addressing only the pain symptom can lead to temporary relief but not true healing.
- Holistic assessment is key. Professionals who evaluate your entire spinal and lower limb mobility can uncover issues you might not notice yourself, leading to targeted and effective interventions.
- Consistency beats intensity. Small daily habits, like the 2-minute ankle drill, accumulate long-term benefits and prevent setbacks.
- Tools amplify progress. Resistance bands, foam rollers, and apps these days make it easier to stay committed and track improvements, turning mobility work into a manageable part of daily life.
- Patience unlocks breakthroughs. Sometimes, the more you push, the more you hinder progress. Gentle, persistent efforts and attentive self-awareness are what truly foster lasting change.
Tools That Elevated My Mobility Game
- MobilityWOD App—The structured routines and progress tracking kept me accountable and showed tangible improvements over weeks.
- TheraBand Resistance Bands—Invaluable for ankle and joint mobilization, these bands made targeted exercises accessible and effective.
- Foam Rollers—Regular myofascial release eased muscle tightness, especially around the shoulders and upper back, complementing mobility drills.
- Personalized Consultations—Working with experts who adopted a full-spine approach helped me understand how interconnected my issues were and tailor solutions accordingly.
Keep Moving, Keep Growing
Your journey toward pain-free mobility is uniquely yours, filled with small wins and valuable lessons. Remember, even the tiniest adjustments—like a focused ankle stretch—can ripple into big changes in your overall well-being. Embrace patience, leverage your tools, and stay committed. Your future self will thank you for the effort you invest today. If you’re ready to explore these strategies or need personalized guidance, consider consulting reputable professionals who understand the importance of full-chain mobility. Are you prepared to take that first small step towards lasting relief? Share your experiences or questions below—I’d love to hear about your progress on this journey.